Your home’s entrance and backyard become a storyteller under a warm light that evokes memories of laughter spilling onto the porch and quiet moments on the front step. When you understand the importance of outdoor lighting, you feel how each beam can paint scenes of warmth and safety across brick and blossom. Thoughtful placement wraps your architecture in gentle attention and coaxes hidden details into a nightly display.
Lights set without care can feel like misplaced notes in a favorite song, leaving your property feeling unsettled and uneven. Shadows that bite instead of beckon can send visitors off balance and dim the pride you feel in every crafted line. In this blog, we will share where to place lighting around your yard so each space shines with purpose and emotion.
Where to Place Landscape Lighting
1. Pathway
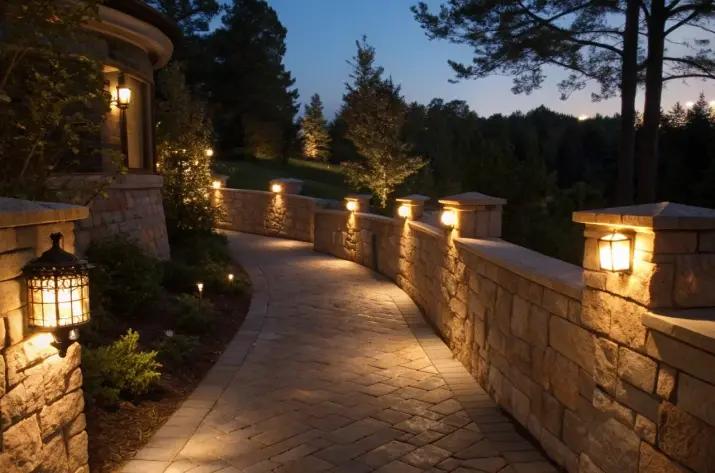
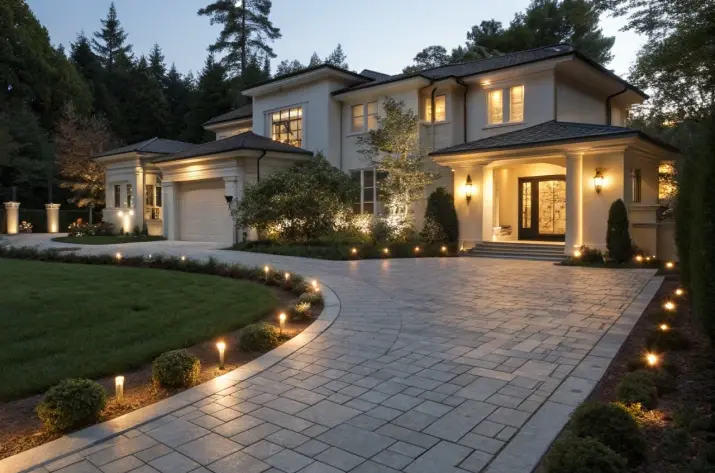
Your walkways welcome every visitor with a seamless flow of light that feels both warm and safe under the stars. Low fixtures set just above the ground cast a soft beam across pavers or gravel without glare. Evenly spaced lights create a ribbon of brightness that guides each step. Accents at turns or level changes add grace and help prevent missteps. The result feels like a caring hand leading guests toward your door.
Lighting Tips
- Space fixtures three to five feet apart for balanced brightness.
- Choose bollards or in-ground lamps aimed downward to keep eyes comfortable.
- Select warm white LED bulbs for a friendly glow.
- Conceal wiring behind edging or beneath plantings for a clean look.
2. Facade and Entry
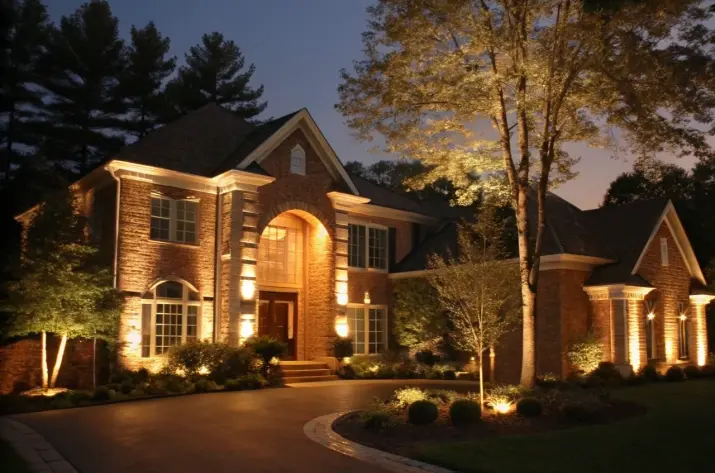
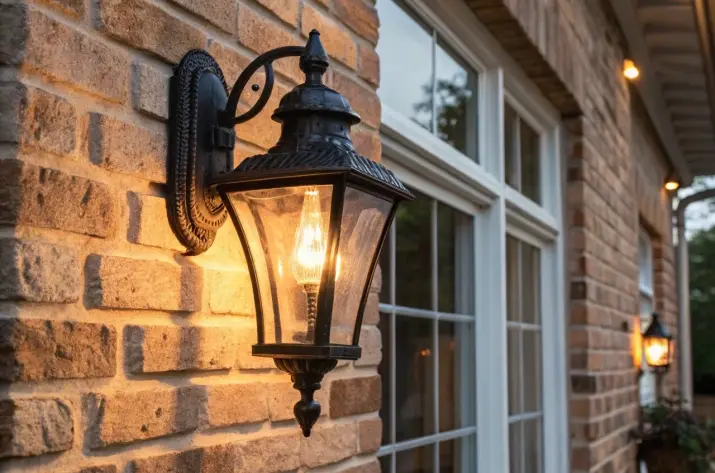
Your front porch and windows form the first impression of your home’s personality. Soft uplights pointed at columns or window trim reveal textures in brick and woodwork. Wall-mounted lanterns on either side of the door draw the eye and add depth. Combining direct wash light with gentle side glow crafts a sense of welcome without harsh spots. This mix makes your entrance feel both grand and inviting at night.
Lighting Tips
- Aim the uplights at a thirty-degree angle to soften shadows.
- Match fixture beams spread to the width of the feature you want to highlight.
- Pair a downlight over the door with side lamps for layered interest.
- Pick simple fixture shapes that fit your home’s design.
3. Garden Beds and Plantings
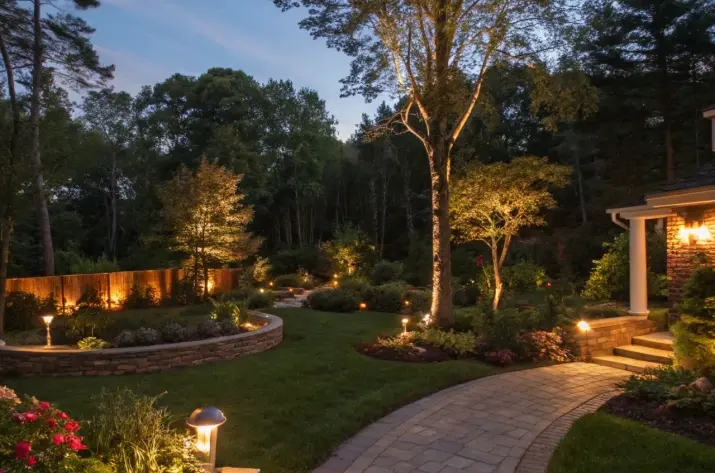
Your flower borders and shrubs come alive when bathed in layers of gentle light. Stake lights tucked at the drip line produce an even wash across leaves and blooms. Backlighting taller plants turns them into glowing silhouettes that sway with the breeze. Using odd-numbered groups of lights adds natural rhythm without feeling crowded. This dance of beams can transform ordinary planting beds into a nightly show.
Lighting Tips
- Use adjustable stake lamps so you can tweak direction as plants grow.
- Mix wide-angle and narrow-angle lenses to highlight both groups and single plants.
- Position fixtures at the drip line for smooth coverage of foliage.
- Consider a low-voltage system for safety and easy relocation as your garden evolves.
4. Brick Walls
Brick surfaces offer texture that pops when washed in gentle light after dusk. A soft wash over brick walls brings out subtle color variations and mortar lines that vanish in daytime shadows. Placing lights at the base pointing upward casts a warm glow that feels inviting and rich. Careful spacing keeps each beam overlapping just enough to avoid dark patches. The result showcases craftsmanship and roots your home in timeless character.
Lighting Tips
- Position well-lit stake lights about four to six feet from the wall.
- Aim lights at a 30-degree angle for smooth coverage without glare.
- Choose LED bulbs that match the brick’s natural hue for authentic warmth.
- Bury wiring behind shrubs or garden edges to keep fixtures the focus.
5. Roofline
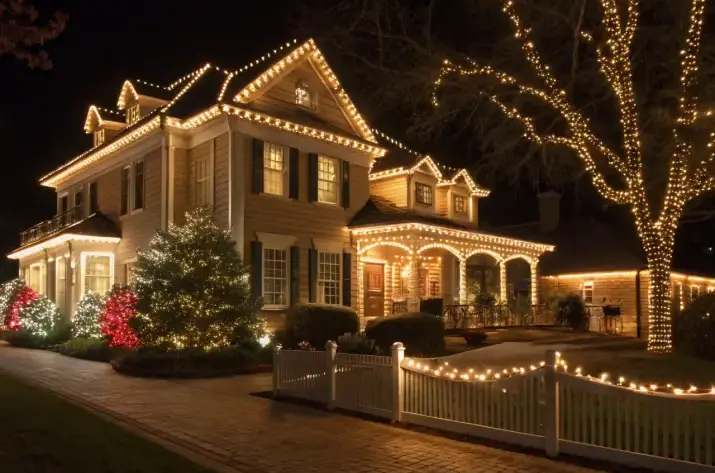
Highlighting roof edges brings a finishing touch that frames your home’s silhouette against the night sky. Low-profile fixtures tucked beneath eaves or behind gutters cast an upward wash that reveals shingles and trim without any hardware in vi-ew. This soft glow makes the structure feel larger and more seamless once darkness falls. Thoughtful roofline lighting also evens out illumination between ground level and upper features.
Lighting Tips
- Use slim under-eave fixtures spaced evenly along the gutter line.
- Opt for a down light spread to soften edges without harsh spots.
- Match the fixture finish to the roof trim for a seamless look.
- Run low-voltage wiring inside soffits for safety and neatness.
6. Patio and Deck Area
Your outdoor gathering spot becomes a natural extension of indoor living once the sun sets. Soft uplights at seating edges define the space while string or pendant lights overhead add layers of warmth. Ground-level fixtures near planter boxes or steps create depth and prevent trips. Balanced lighting here invites conversation and highlights surface textures of wood or stone.
Lighting Tips
- Combine stake lights near planters with subtle overhead pendants.
- Keep overhead bulbs at least seven feet above the floor for headroom.
- Use warm white LEDs to mimic candlelight without flame.
- Choose fixtures rated for damp locations to withstand evening humidity.
7. Place Water Feature
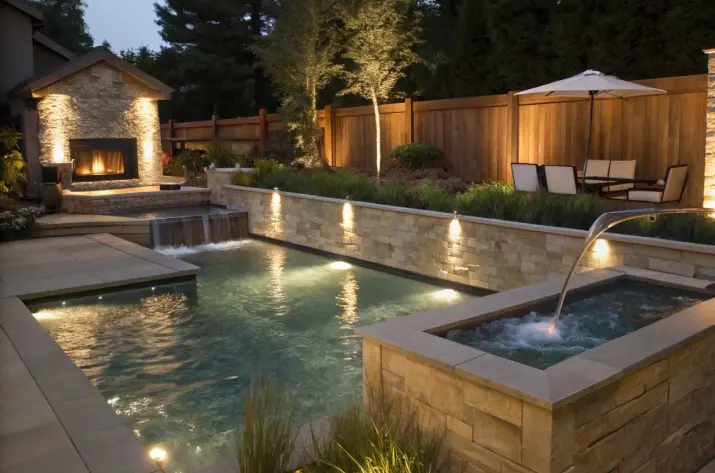
A pond or fountain becomes a centerpiece when gentle beams ripple across its surface after dusk. Soft uplighting at the water’s edge highlights movement and creates a shimmering effect that draws the eye. Fixtures placed just below the waterline cast reflections that double the visual impact. Grouping lights around curves brings flowing lines to life and adds a sense of calm to your outdoor space. The result feels like a private retreat under the stars.
Lighting Tips
- Install waterproof fixtures rated for submersion at least one foot below the water’s edge.
- Aim the lights back toward the feature for balanced reflections without glare.
- Use wide beam angles to cover broad surfaces of moving water.
- Choose color temperatures that match surrounding fixtures for cohesive warmth.
8. Driveway
Your driveway sets the tone long before guests reach the front door and benefits from steady illumination along its edge. Low-stakes lamps reveal material texture and help drivers align wheels safely. Placing fixtures just off the pavement creates a clean border of light without cluttering the surface. Even spacing keeps the path feeling open and welcoming from the street to the garage. Well-lit driveways feel effortless and safe at any hour.
Lighting Tips
- Space stake lights five to eight feet apart, depending on driveway width.
- Aim fixtures slightly inward to avoid spilling light into neighboring yards.
- Select durable fixtures designed for vehicle proximity and occasional spray.
- Wire on a separate circuit or timer for independent control from other zones.
9. Stair Risers and Steps
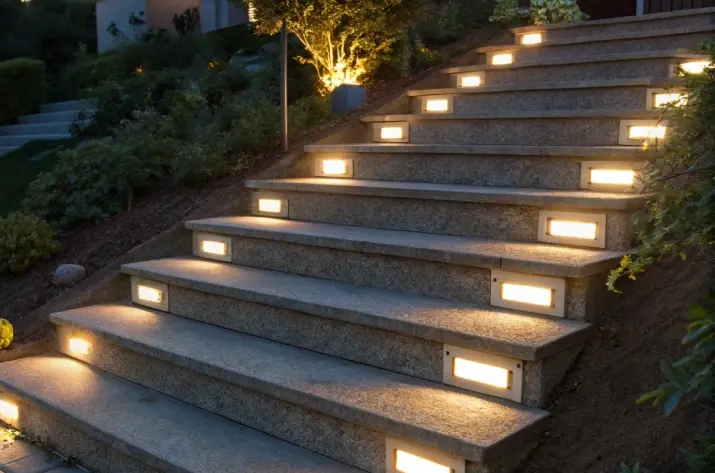
Steps and stair risers form both a pathway and a focal point after dusk. Lights tucked beneath each tread cast a gentle wash that makes each rise clear and safe underfoot. Embedding low-level fixtures into risers avoids glare while highlighting the stair geometry. A consistent glow across every step turns a simple ascent into a graceful approach. This subtle illumination also adds a touch of refinement that feels thoughtfully designed.
Lighting Tips
- Install recessed fixtures under each tread at the back edge for even coverage.
- Space lights one per step or every other step, depending on the rise height.
- Choose warm white LEDs to maintain a welcoming feel without harsh contrast.
- Aim beams downward and slightly forward to avoid shining in eyes.
- Conceal wiring inside stair stringers or beneath decking for a seamless look.
10. Pergola Beams and Overhead Rafters
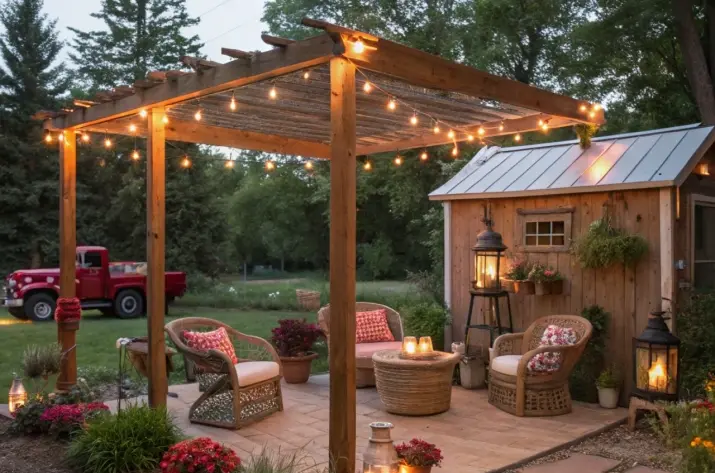
Your pergola becomes an enchanted canopy when beams catch soft light from above. Small fixtures tucked atop rafters wash downward, highlighting wood grain and casting patterned shadows. String lights woven through beams add sparkle without harsh spots. This overhead glow turns the structure into an intimate lounge under the stars. Proper spacing creates a sense of enclosure while keeping the space open and airy.
Lighting Tips
- Attach low-profile fixtures to upper beams, pointing down to illuminate seating below.
- Combine string lights with fixed lamps for both sparkle and a steady glow.
- Hang bulbs at varying heights to add visual depth without clutter.
- Use weatherproof fixtures rated for outdoor overhead use.
11. Place Seating Walls and Built-In Benches
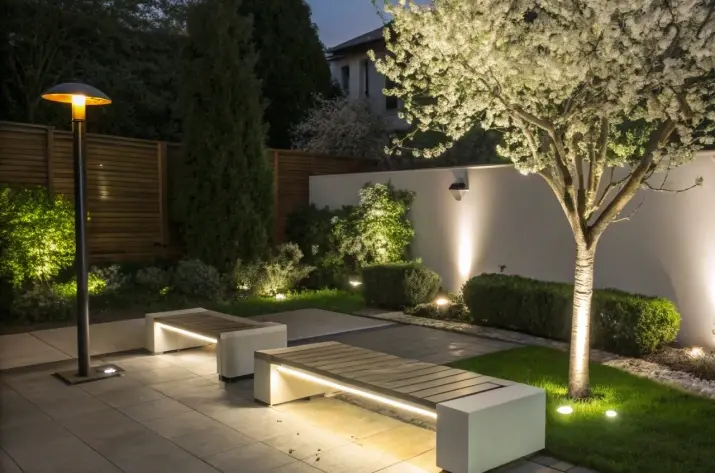
Walls and benches around your yard become inviting perches when softly lit from below or behind. Lights recessed into the wall base cast a gentle wash up surface, drawing attention to textures and contours. Under-seat fixtures highlight bench lines and prevent trips when guests rise or sit. This subtle glow turns seating into a sculptural element that welcomes lingering conversations. The effect feels both safe and artfully composed.
Lighting Tips
- Install recessed trough lights beneath bench lips to wash wall faces evenly.
- Use adjustable pucks below seat edges to soften shadows on legs and ground.
- Space fixtures evenly along the seating run to avoid dark spots.
- Conceal wiring within wall cavities for a clean installation.
Do’s of Landscape Lighting
1. Focus on Safety and Practicality
Your first priority is practical use and safety. Well-placed fixtures keep walkways clear and offer outdoor security lighting ideas that protect family and guests. Thoughtful beams prevent trips on steps and reveal potential hazards. This approach adds genuine functionality to your home rather than mere decoration. Always test sight lines at night to confirm each area feels secure and welcoming.
2. Enhance Curb Appeal
A thoughtful layout lifts your home’s street‑side charm and makes that all‑important first impression. Carefully chosen fixtures accent porches, entryways, and garden edges without overwhelming the scene. Putting intent behind each beam lets you design landscape lighting that highlights architectural lines and plant textures. When every element works in harmony, your home feels both grand and approachable,
3. Opt Energy Efficient Solutions
Long evenings need long‑lasting performances. Selecting LED lamps and low-voltage systems slashes power use while still delivering bright, even coverage. Timers and smart controls let you adjust run times without manual fuss. Energy savings here add up fast and allow you to keep more zones active without surprise bills,
4. Achieve Balanced Visual Harmony
Too much light in one spot throws off the composition. Aim for gentle transitions between bright and dark so each zone reads as part of a whole. Mix wall wash, uplight, and spot beams in measured doses. Steady rhythms of light and shadow create a unified scene that feels natural under the stars.
5. Factor in Installation Cost
A clear budget keeps dreams grounded. Research the average landscape lighting cost installation in your area and set realistic limits on fixture quality and quantity. Remember that quality wiring and professional setup protect your investment. When you know the figures up front, you avoid unexpected expenses halfway through.
6. Collaborate With Experts
Even the best DIY plans benefit from a professional eye. Skilled installers bring refined techniques and local knowledge that help create a well-lit environment every time. They can recommend fixture models suited to your soil, plant growth, and weather conditions. This partnership delivers lasting results you’ll enjoy without constant tweaking.
7. Select Durable Materials and Fixtures
Opting for corrosion-resistant metals and impact‑resistant lenses protects your investment from weather and wear. Lighting options with IP65 or higher ratings, as they can stand tall against rain, humidity, and also don’t rust easily. Solid brass or stainless steel fixtures don’t need frequent replacements. Investing in quality gear means fewer replacements and a cleaner look for years.
8. Plan for Future Maintenance and Access
Design your layout so bulbs and wiring remain reachable without disrupting plantings or hardscape. Removable covers and twist‑lock connections simplify bulb swaps and cleaning. Label circuits clearly at the transformer or panel to speed up repairs. A maintenance‑friendly system reduces downtime and keeps your lighting scheme performing as intended.
9. Integrate Smart Controls for Convenience
Link lights to programmable timers, motion sensors, or smartphone apps for effortless operation. You can set dusk‑to‑dawn schedules that match seasonal changes without manual adjustments. Motion triggers near gates or walkways boost security without running lights all night. Smart control also helps conserve energy while keeping every zone active when you need it.
10. Field Test and Fine-Tune at Night
Before locking in fixtures permanently, run a trial after sunset to spot dark patches or glare. Walk each zone, noting areas that feel too bright or fall too dim. Adjust beam angles and reposition lights until the glow feels consistent and welcoming. This hands‑on tuning ensures the final installation reads exactly as envisioned under real conditions.
Dont’s of Landscape Lighting
1. Avoid Too Much Light
Excess brightness can wash out focal features and feel overwhelming rather than welcoming. Too many fixtures in one spot can create visual clutter and leave other areas in stark contrast. Keep each beam measured so your yard never feels garish.
2. Watch for Shadows and Dark Spots
Overlooking tiny gaps leaves unsettling black holes that undermine safety and mood. Walk the space after dusk to spot every hidden corner. Adjust angles or add low fixtures so visitors never stumble into an unlit void.
3. Keep Wiring Hidden
Visible cables break the polished look of your scheme and pose tripping hazards. Bury lines beneath mulch or tuck them behind edging so they remain out of sight. This simple step also helps you avoid a costly landscape lighting installation mistake.
4. Avoid Harsh Glare
Placing lights at eye level or pointing beams directly into sightlines causes discomfort and detracts from your home’s best angles. Mount fixtures low on walls or shield them behind plantings so light accentuates textures without blinding your guests.
5. Resist the Urge to Rush
Skipping a trial run or locking in placements too quickly invites regrets and extra costs for rework. Take time to fine-tune angles and verify each zone reads as intended after sunset before securing fixtures permanently.
6. Avoid Relying Entirely on DIY
Taking the whole project into your own hands may seem budget-friendly, but it comes with risks. Improper connections, poor fixture alignment, or overloaded circuits can lead to frequent breakdowns or safety issues. Skipping technical details often leads to uneven results or costly do-overs. A well-balanced system benefits from the right tools, tested techniques, and real field experience.
Conclusion
Every corner of your outdoor space holds potential that only comes alive when lighting is placed with care. From steps that glow with gentle safety to walls that whisper stories through soft shadows, each beam has a job to do. When the placement is thoughtful, your yard feels effortless, inviting, secure, and quietly stunning. Miss the mark, and even the most expensive setup can fall flat.
Let intention lead every decision. Balance light and dark. Choose a function before flair. And remember that the beauty you build during the day deserves just as much attention after the sun goes down. At Elevated Seasons, we understand that excellence begins with precision. Our landscape lighting installation services are crafted not just to brighten, but to reveal. Every fixture is placed with purpose. Every angle is tested with care. When you choose Elevated Seasons, you choose lighting that reflects the best version of your home even after dusk.


