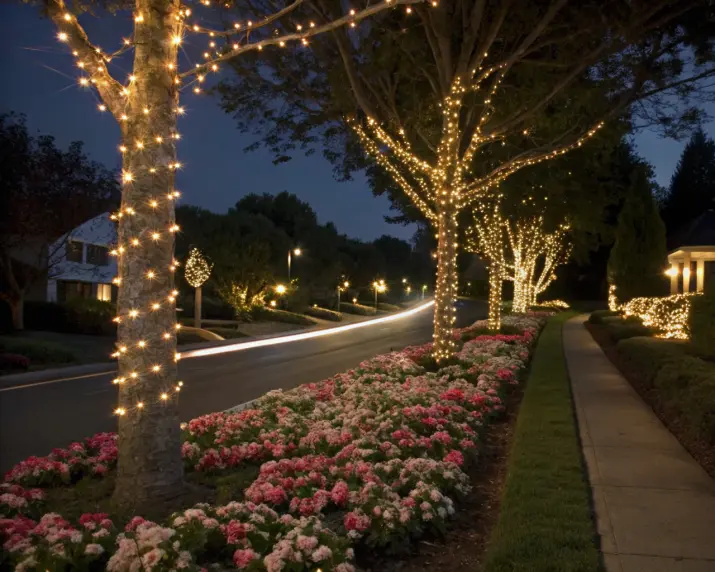
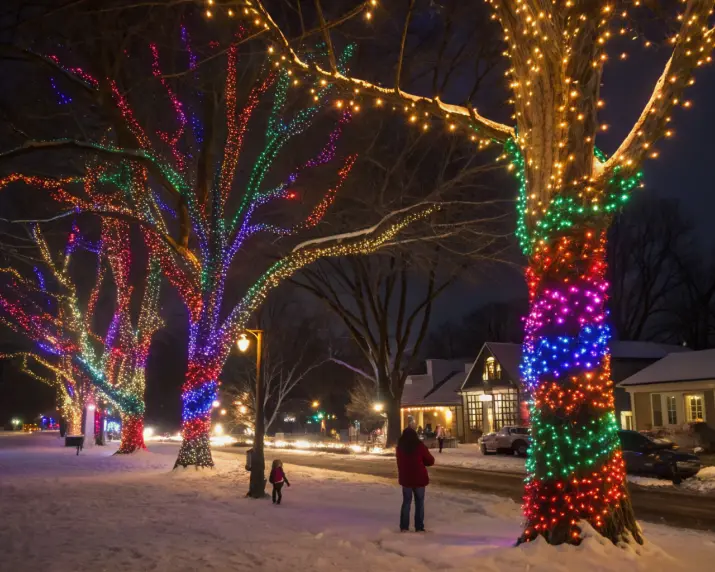
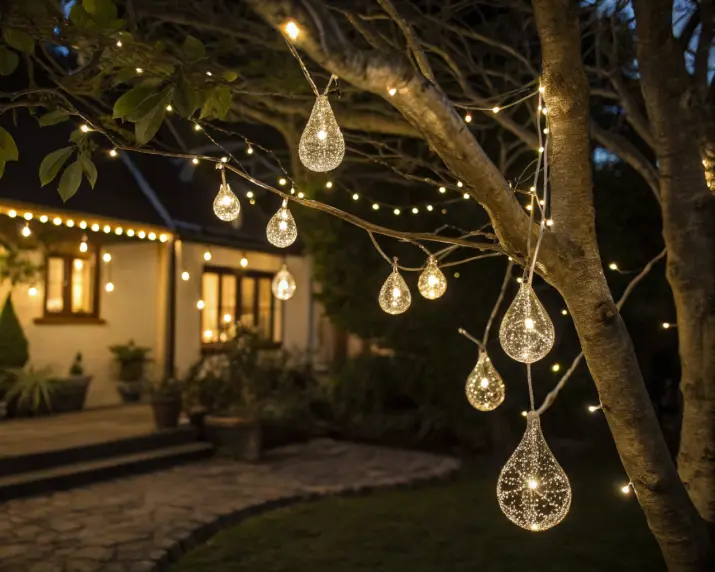
During the Christmas season, regular places are lit into gorgeous winter wonderlands, shimmering all across the city. The outdoor lights add an aesthetic and warm vibe. Do you want to decorate your outdoor space into something just like this? Then you are at the right place. Elevated Seasons has helped a number of Los Angeles residents turn their outdoor Christmas decorations into displays with lights that add to the festive appeal of their homes.
This blog will help you understand how to install Christmas lights on outdoor trees. Let’s get started.
Preparing and Choosing Outdoor Christmas Lights
Outdoor Christmas lights bring warmth and sparkle to your home. Before you start outdoor lighting decor, it’s important to prepare and pick the right lights for lasting results.
Choose Your Lights
The first step in a successful tree lighting outdoor installation process is to select the appropriate lights for your trees and desired decor. LED lights have become the finest choice for outdoor Christmas decorations due to their low energy consumption, extended lifespan, and brightness. These lights use up to 75% less energy than ordinary incandescent bulbs and last far longer. They are a terrific choice for homes that prefer sustainable lighting.
When picking outdoor tree lights, keep in mind the size of your trees and the look you want to achieve. Warm white lights seem classic and elegant, and they go well with most styles of architecture. On the other side, multicoloured lights make things feel happy and festive. Moving on to the next- cool white lights create a sleek, modern look that goes well with new landscaping.
Always utilise lights that are made to be used outside for any outdoor decoration. These lights can handle rain, wind, and variations in temperature during the Christmas season because they are waterproof. To be sure that your lights perform effectively in all kinds of weather, look for ones with sturdy wire designs and sealed bulb connections.
Figure out How Many Lights You Need
So, how to wrap a tree with lights? Think about the size of your trees, how bright you want the lights to be, and how you want to wrap them to figure out how many Christmas lights to place on them. Plan on putting roughly 100 lights on each foot of height if you want an elegant, tall Christmas tree. If you want a tree that is fully lit, increase this number to 150 to 200 lights per foot of height.
You might not need as many lights for smaller trees with thick foliage, but you might need more strands for bigger trees with fewer branches to cover them evenly.
Check Your Lights
Before you start putting anything together, test all of the light strands to find and fix any broken parts or burned-out bulbs. This step saves time and effort when putting things together, especially when wrapping enormous trees or utilising complicated patterns.
Connect each strand to a functional outlet and check each one carefully to make sure that each bulb shines the right colour. Be extra careful around the spots where the light parts meet because those are the most likely to break. Change any burned-out bulbs right away, as they could cause large areas to fail and prevent the lights from working properly.
Check that all the bulbs in your LED light strands are the same colour and brightness. If the bulbs don’t match, your finished display might not look the same, which could make it look less professional.
Use Light Balls to Avoid Tangling
Still looking for any errors to avoid while learning how to wrap a tree with lights?
Professional installers employ the “light ball” method to keep things from becoming tangled and to make sure the installation proceeds smoothly. This approach calls for carefully winding your light strands into a ball that is simple to hold and will easily unroll as you travel around the tree.
To begin, find one end of your light strand and leave around three feet of cable free so you can connect it to your power source. Begin wrapping the lights in loose loops, ensuring there is enough space between them so they don’t get stuck together. Don’t wrap the lights too tightly, because this could damage the insulation on the wires and make it harder to put them up.
Make little balls for lengthy strands of light. This will help you keep the strands in check and minimise the chance that they will get tangled when you wrap them. To retain the shape of the light ball during shipping and installation, use twist ties or rubber bands at key points.
How to Wrap Lights on Trees: Step-by-Step Guide
Wrapping trees is a very easy method to make your outdoor holiday display stand out. This is a step-by-step guide that will help you wrap your trees safely and stylishly.
Start at the Base
The first step of the guide on how to install Christmas lights on outdoor trees begins with the base. Put the lights on your tree near the base of the trunk, and make sure you start close to the power source so that the extension wires don’t show as much. Make sure your light string is long enough to reach the outlet without putting too much strain on the connections. Use small clips or ties made for outdoor lighting to attach the first few lights to the base of the tree. These first anchor points are very important for making sure the lights stay in the right place as they are being put up. Don’t use metal fasteners that could hurt the tree bark or make the area unsafe for electricity.
Put your light ball wherever you can easily reach it, but not where other people might accidentally hit it. If you’re working with bigger trees or longer light strands, it can be a lot easier to install them if someone else holds the light ball.
Cover the trunk
How to wrap a tree with lights? Well, it can start with the tree trunk.
To build your foundation pattern, start at the base of the tree and work your way up in a spiral. Depending on how big the tree is, spacing each wrap out evenly, usually 4 to 6 inches. This distance will let the net cover a lot of ground and show off the tree’s bark texture.
Keep the light strands close to the trunk, but don’t pull them so hard that they damage the bark or hinder the tree from growing normally. As trees become older, they get bigger. If you wrap them too tightly, it might hurt the tree and make it sick.
Wrap the branches
Start with the tree’s biggest branches and work your way out from the trunk in a fashion that follows how the branches grow naturally. Start at the thickest parts near the trunk and work your way out to the thinner tips, wrapping each main branch separately. This method flows naturally and appears like how the tree is made.
You can see the branches of deciduous trees better when they don’t have leaves, which makes it easier to form symmetrical patterns. Evergreen trees are great for hiding places and spreading light for wire lines because they stay green all year. However, they make it harder to get around thick foliage.
Safety First
Safety with electricity should always come first when putting up lights outside. Use Ground Fault Circuit Interrupters (GFCIs) to keep your outside Christmas lights from becoming wet at all times. This will stop people from getting shocked. Check GFCI outlets once a month throughout the holidays to be sure they are working properly.
Before and during use, look for evidence of wear, corrosion, or moisture getting into all of the electrical connections. Instead of trying to mend broken parts temporarily, which could be dangerous, replace them straight away.
As the manufacturer says, you should never connect more than the recommended number of light strands in a row. Overloading electrical circuits can cause them to get excessively hot, start a fire, or break down tools too quickly. If you’re not sure, don’t push the circuits you currently have too far. Instead, use extra ones. Hanging Christmas lights in trees should be followed with precaution.
Get to the Top for Hanging Christmas Lights in Trees
Hanging Christmas lights on trees requires a lot of effort. As you climb the tree, preserve the same pattern and spacing between the branches. Start at the bottom and work your way up. This careful method makes it easier to discover and solve problems before they get too big, and it also makes sure that coverage is always the same.
Be more vigilant about safety as you get higher up the tree. When utilising a ladder, always keep three points of contact and never reach too far past your stable working position. Think about employing extension poles or professional tools for big trees instead of merely ladders.
The branches get thinner and more numerous as you go up the tree, so move your lights closer together. The lights need to be closer together so that the smaller branches look like the lower portions that are more brightly lit. This is one of the important safety precautions in learning how to install Christmas lights on outdoor trees.
Secure the End of the String Light
It’s crucial to finish your light strands appropriately for both safety and looks. Whenever you can, hide the end connections in the leaves of the tree. Use small clips or ties to keep them from hanging below the canopy. To keep all of your connections safe and shielded from the weather, choose connectors that are meant for outdoor use. If the connections aren’t tight, the lights could flicker or go out at strange times, which makes the display less safe when it’s wet. If you need to connect more than one light strand, be sure to plan the connecting points properly. This will hide the cables better and make sure that the electrical flow is the same all over the display.
Please note: Installing lights on tall trees is challenging because they need certain tools and methods to do it safely and effectively. Long light strands made specifically for trees in homes and businesses can cut down on installation time and give better coverage than several shorter strands.
Take a step back and observe
After you’ve completed installing, take a step back and look at your work from different angles and distances. This last check will help you find any areas that aren’t level, have gaps in coverage, or need to be addressed before you consider the project done.
Look at the covering from all sides and all the way around the tree to make sure it appears even and professional. Take a good look at how the tree looks from the street and the main locations of your house where you can see it.
Creative Decorating Ideas
There are a lot of entertaining ways to use Christmas lights that go beyond the basics. Here are some fun ways to decorate that can give you some inspiration for your display.
Color Themes and Patterns
Colour pattern is an important aspect if you are wondering how to install Christmas lights on outdoor trees.
Modern Christmas lighting goes well beyond the old ways of doing things. It gives homeowners many chances to make displays that are one-of-a-kind and match their personal style and the landscaping they already have. Monochromatic colour schemes with different shades of blue, purple, or amber provide classy displays that are different from the usual red and green ones.
To add depth and visual intrigue, think about using more than one sort of light in the same piece. To make layered displays that look different depending on how far away and from what angle you look at them, mix normal small lights with bigger C9 bulbs, icicle lights, or lights in unusual shapes.
To make your outdoor displays look like they belong together, make sure your tree lighting works with other parts of the environment. Use colours that match or go well with the ones used in pathway lighting, architectural highlights, or garden elements to make designs that work together and make the whole outdoor space look better.
Wrapping Only Branches for a “Skeleton Glow”
Knowing how to install Christmas lights on outdoor trees helps you decorate stress-free. The “skeleton glow” technique involves lighting only the branches while leaving the trunk dark, creating striking silhouettes that highlight the tree’s inherent beauty.
This approach works particularly well with trees having interesting branch patterns or distinctive shapes that deserve emphasis. Japanese maples, flowering dogwoods, and other ornamental trees become sculptural elements when lit using skeleton glow techniques.
Vary light density based on branch thickness and importance within the overall composition. Primary branches may receive denser lighting, while secondary branches use more subtle illumination to create depth and hierarchy within the display.
Using Net Lights for Shrubs
Net lighting methods that cover a large area with minimal effort are generally suitable for large shrubs and small trees. Net lights spread out evenly across plant surfaces, creating a smooth light coverage that would take a long time to achieve with regular string lights.
Select net light sizes that are suitable for your plants, ensuring they cover a sufficient area without excessive overlap or gaps. Many smaller nets typically look and cover better than one large net that is stretched too far.
Use strand lights to add accent lighting to net lights, creating layered displays with different levels of brightness and visual appeal. Use strand lights to draw attention to specific parts of a plant, and use net lights to illuminate the entire area and conceal the backdrop.
Elevated Seasons is one of the best Christmas light installation companies in LA. We can help you turn your outdoor spaces into a warm place.
Conclusion
Learning how to install Christmas lights on outdoor trees opens up endless possibilities for creating stunning holiday displays that transform your entire outdoor living space. From understanding proper light selection and preparation techniques to mastering professional installation methods, each step contributes to achieving results that rival those of experienced holiday decorators.
Ready to elevate your holiday display with outdoor Christmas lighting installation? Contact Elevated Seasons today to discover how our expertise can transform your outdoor space into a winter wonderland that captures the true spirit of the season.


